How to make a website simply and quickly with Bootstrap studio
Introduction
Bootstrap studio is a powerful software that allows to make prototypes of websites and reactive applications thanks to the bootstrap framework (css, JavaScript ,SASS)
This tutorial is made using bootstrap studio 5.0.3
The version of the bootstrap used is 4.4 and 3.4.
Bootstrap studio allows us to host our websites online, it includes a local server and a text editor.
Prerequisites:
No programming knowledge is required, but the knowledge of html, JavaScript and css will be advantageous for you.
Installation
To install Bootstrap studio, which is unfortunately not free there is a standard version which costs 29$ which is more than enough for personal use and offers a lot of components and the lifetime version which is 60$ recommended for corporate projects.
Visit the bootstrap studio application
When you open the application you will see this window

- New design: to create a design
2. Open: to open an existing bootstrap studio project
3. Getting start: which allows you to follow the documentation of bootstrap studio
Step 1: Creating new design
Click on the new design button and you will see that there is a full design already made for us, select the blank which is an empty page. In name write home which will be the titles of the pages of our design then click on create.

Step 2: Exploring bootstrap studio
This is how bootstrap studio presents itself at the creation of our design

- The tab 1 allows you to control our project, allows us to open the parameters, export our design, start the server, etc. I strongly advise you to explore it.
- Tab 2 includes the default components that come with bootstrap studio (please explore) in the studio part and in the online part they are components that we download online (like login pages, articles, etc) Components are elements that we will put on our page (like menu, footer, etc).
- The tab 3 Overview is where all the html tags of our page appear, by default the html and body tags are locked so we can’t modify them.
- The tab 4 it is about the appearance of our page, the animations, the mode of display
- The tab 5 Design there is the menu page which will contain all the html pages of our project, the menu style which will contain the css files of our project, the menu javascript which will contain the .js files of our project, the menu font which will contain the font files of our project, the menu image which will contain all the images of our project.
- The tab 6 there is our empty page which is the body on which we will put our components, there is already the page index.html which is chosen by default and also the forms of displays of our design according to the dimensions of screen (telephone, tablet, MD, pc, desktop).
- Tab 7 is the same is the text editor there is the html part that allows you to view the different tags on the different pages of our design and the style part that allows you to edit the code and see the style of our page.
Step 3: Download components online
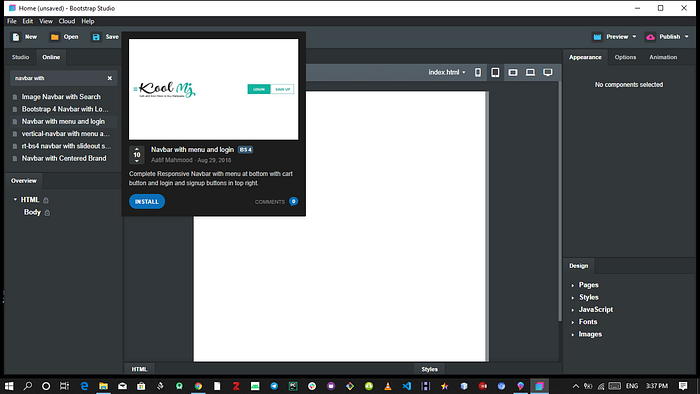
- Click in the search area and write navbar to have a menu, take navbar with menu and login click on install.
- Type login in the search bar and take Login Box and install.
- Do the same for a slide search best carousel slide and install it.
Step 4: Drag and drop ui components
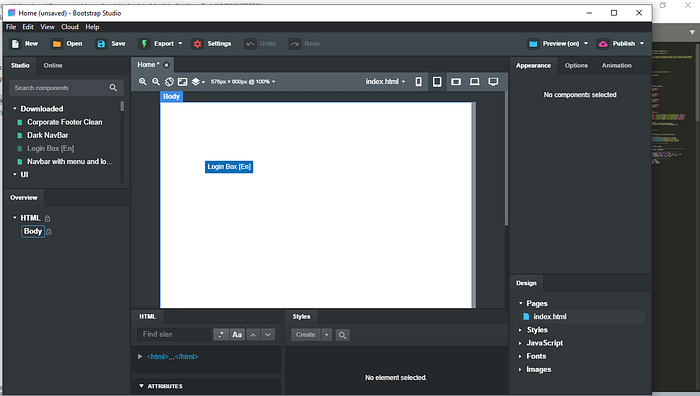
After downloading the components we see in tab 2 the studio part which has a download menu which has just been added and contains the downloaded components.
To arrange the components on our body make a click on the component drag it on the body and drop the ca will be placed according to the hierarchy of components in html
Select navbar with menu and login and drop it on our page, do the same for best carousel slide and footers basics.
Step 5: Create a new login.html page
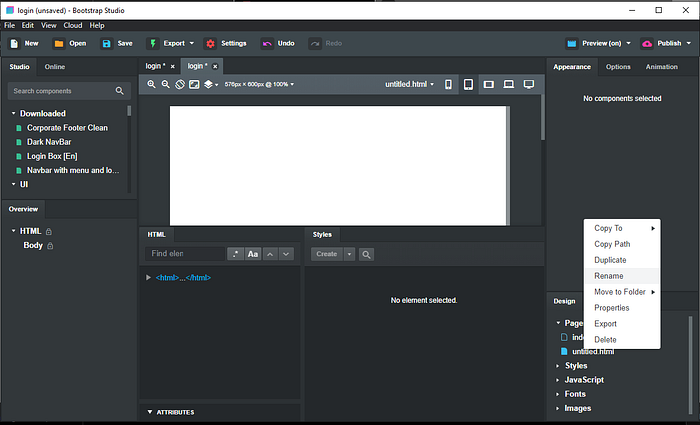
Go to tab 5 in the page menu click on the page login.html here it is now select and we have an empty body
Select Login Box [En] drag and drop it on the body
Step 6: Link index.html to login.html
In index.html select our navbar and edit the code in the login tag, enter as href login.html then press apply and it’s done, you have just connected the two pages.
Step 7: Launch the server
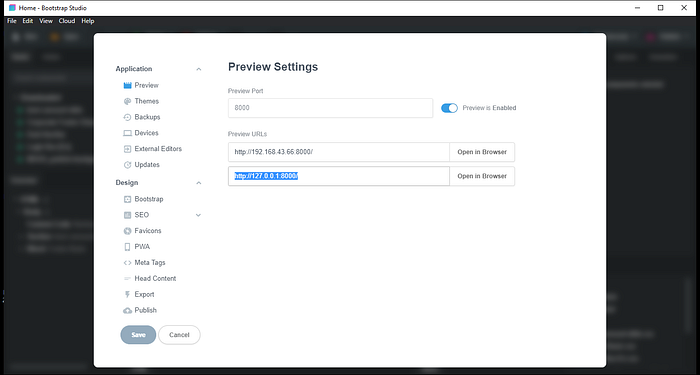
In tab 1 click on preview and activate it you can go to preview options to see the port used by our server, as well as the URL
You just have to type 127.0.0.1:8000/ to see what our site looks like in the browser.